OSINT tools - AccessData FTK Imager. How to install and get started with Drive Imaging
Bonus: A widely acclaimed reverse image search tool
Introduction
A forensic image (forensic copy) is a bit-by-bit, sector-by-sector direct copy of a physical storage device, including all files, folders and unallocated, free and slack space. Forensic images include not only all the files visible to the operating system but also deleted files and pieces of files left in the slack and free space.
How this is different and much more valuable than a normal copy or imaging of a drive is that in the case of cybercrime, additional evidence may be discovered other than what is visible/available to the Operating system, for example incriminating evidence that might have been deleted to prevent discovery, unless the data is deleted and securely overwritten, it can be recovered with forensic or some file recovery software. Also, creating and backing up a forensic image helps prevent loss of evidence/data due to original drive failures. Forensic imaging is often the first step taken by Digital forensics experts when they attain a drive that can be used as evidence in a case.
However, it is important to note that not all imaging and backup software create forensic images, for example Windows backup, creates image backups that are not complete copies of a physical drive. This is where the topic of our discussion comes into play...
AccessData FTK Imager
FTK Imager is an open-source(of course) software by AccessData used for creating accurate copies of the original evidence without making any changes to it whatsoever. FTK Imager has a lot of feature set built into it, However, today we are going to focus on acquiring a forensic image from a drive. FTK imager also provides you with the inbuilt integrity checking function which generates a hash report which helps in matching the hash of the evidence before and after creating the image of the original Evidence
Download and Installation
To get the Software on my PC, I paid a visit to Exterro site (.com), scrolled down to Exterro Software Apps column and chose FTK Imager, this opened to a dedicated FTK imager page where I clicked on the download FTK Imager, I was asked to fill a form which requires you to have a business email (I did discover however, that just about any email will work business or not.) to continue with the Download which will be started automatically once you submit your details. After the file is downloaded - which is in exe format - I went right ahead and run the file which prompted me for permission before it goes ahead with installation. The installation Wizard is very straightforward and I only had to accept end-user terms and choose the install directory, the installation process usually takes around 5 minutes or less to complete.
Creating a Forensic Image
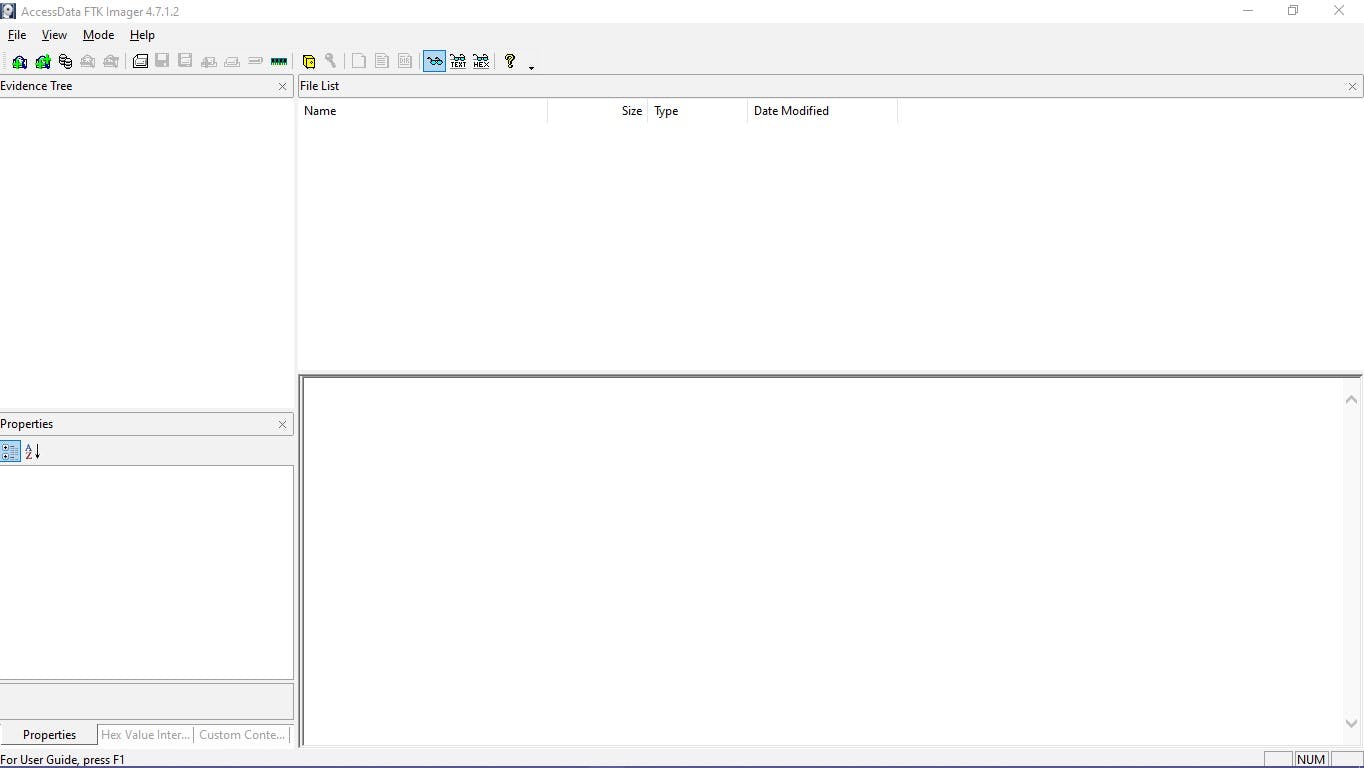
Upon successful installation, open FTK Imager and you will be greeted by the main window.
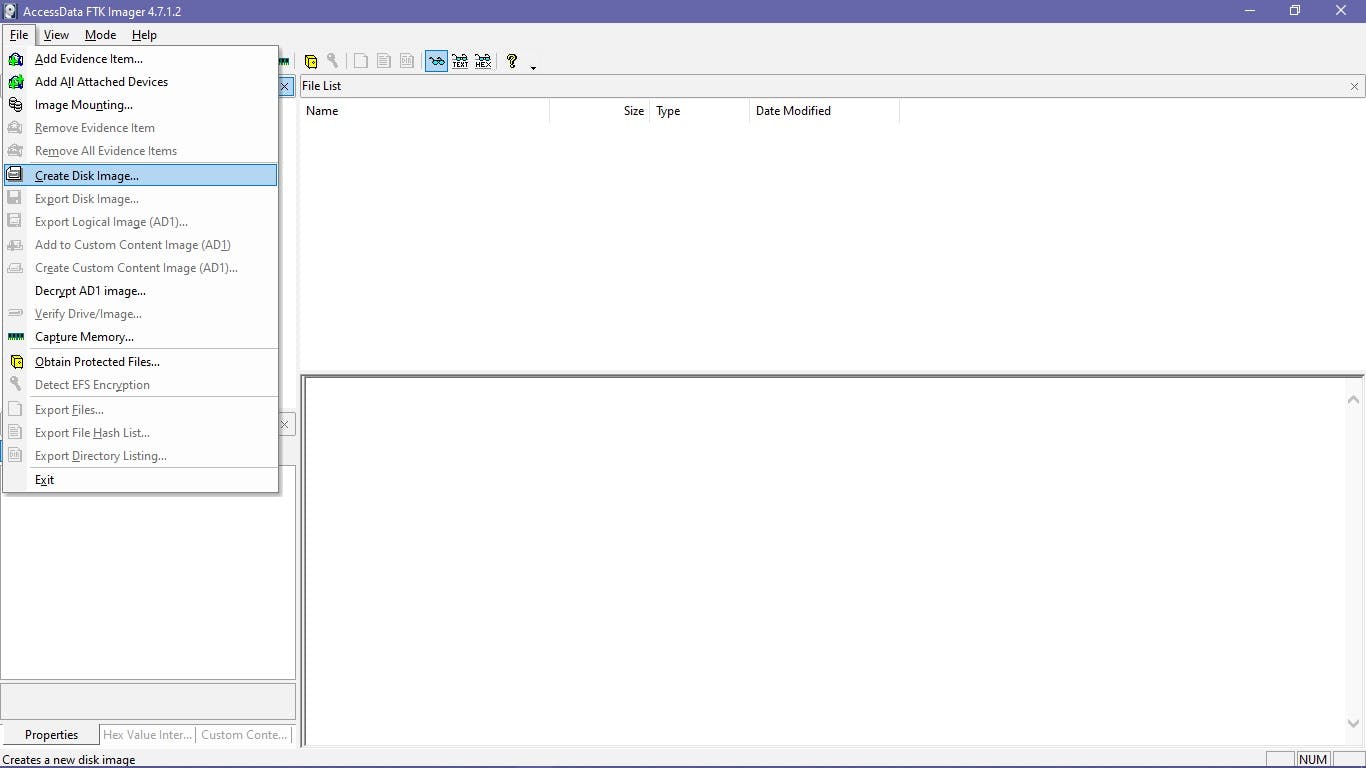
 To create a disk image, click on File > Create Disk Image
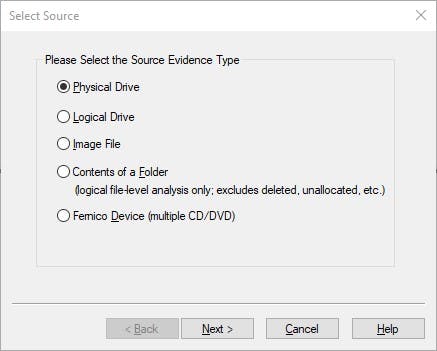
Now you can choose the source based on the drive you have. It can be a physical or a logical Drive depending on your evidence. A Physical Drive is the primary storage hardware or the component within a device, which is used to store, retrieve, and organize data. A Logical Drive is generally a drive space that is created over a physical hard disk. A logical drive has its parameters and functions because it operates independently. For example, Partitions created within a physical drive.
For this article, I have a Physical drive of 32GB, so I will be choosing physical Drive
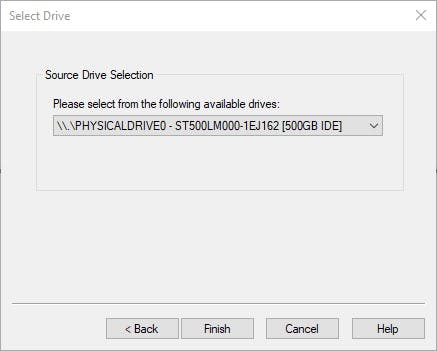
And then select the 32GB volume from the list of options in the drop down menu
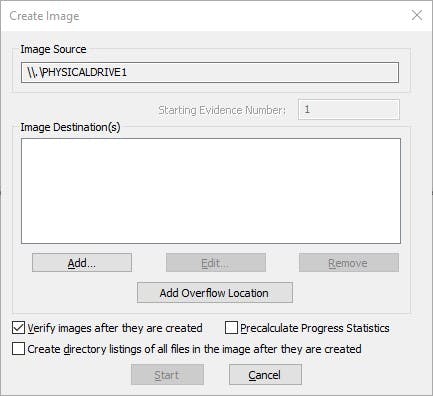
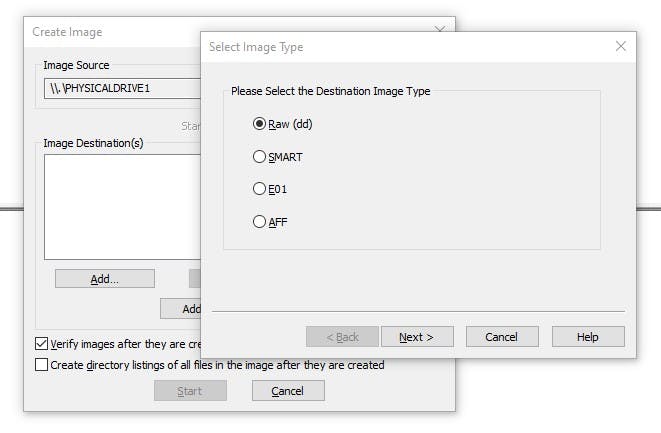
Next, I added the destination path of the image I want to create. Best practices require this destination to be a separate hard drive from the one you are creating an image of. I ticked the Verify image Box (this creates a hash after the image is created to make sure it matches with the original). Once I clicked Add, I was prompted to choose the format/type. The options are
Raw(dd): It is a bit-by-bit copy of the original evidence which is created without any additions and or deletions. They do not contain any metadata.
SMART: It is an image format that was used for Linux which is not widely used anymore.
E01: Stands for EnCase Evidence File, which is a commonly used format for imaging.
AFF: Advanced Forensic Format that is an open-source format type. I went ahead and chose Raw and clicked next
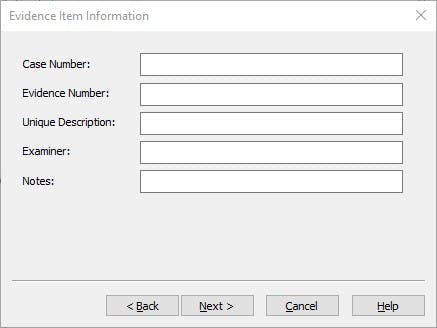
Afterwards, I was asked to fill an Evidence Item Information form, this asked for Case Number, evidence Number, Examiner etc. Details that will help to identify the image.
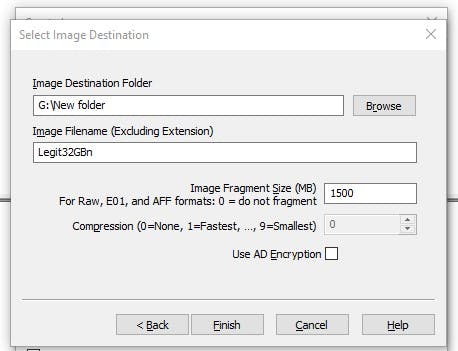
Next, I was able to add the destination path for the image, I chose an external drive that was attached to my PC and gave the image a filename and clicked finish.
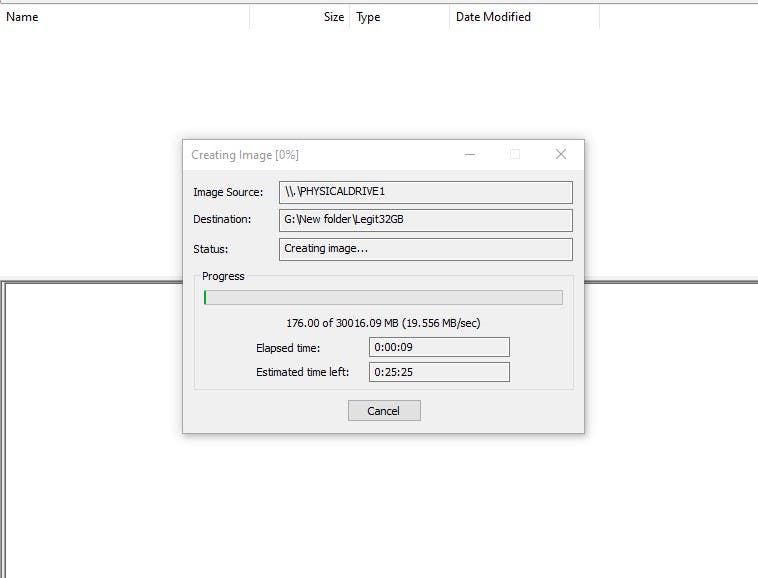
After that, I was brought back to the original dialog window and I clicked Start to begin the image creation. A progress bar tracked my progress and showed me the estimated time left to completion.
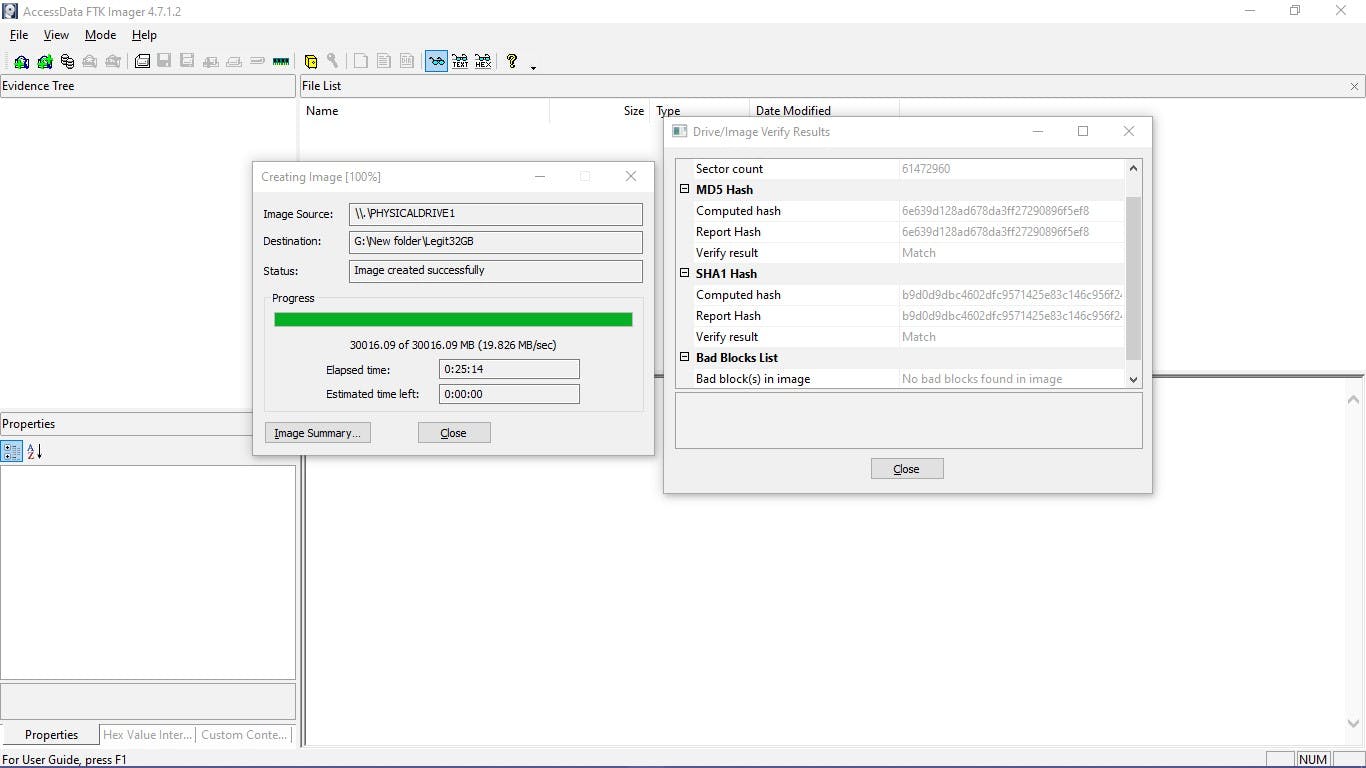
After the image was created, I was prompted and the Hash result was generated which verified the MD5 Hash, SHA1 Hash, and checked for the presence of any bad sectors. All this is done to ensure the accuracy and integrity of the image.
Apart from creating forensic images, FTK Imager can also do a lot more, like Memory Capturing - which is the capturing of volatile memory i.e RAM and dumping the contents to a non-volatile storage device to help investigation. There is also the capability of mounting an image to drive so you can be able to access it. However, Drive Image Capturing is all we will cover for now.
Bonus Tool
Yandex
Yandex is a Russian-based search engine, it uses a combination of image recognition and facial recognition to bring you accurate results, whether you’re uploading a picture of an object, building, or person. It requires no registration, and you will never have to pay for it, making it the most accessible facial recognition software on the web. The site uses artificial intelligence and neural networks to accurately scan faces and bring up results with the same person. The best thing about Yandex is that by clicking on any of the returned images, you can view information about the image, things like Social media profiles matching the images. Links to where the images were found also accompany the resulting images This is very handy for crime investigation.
The trick to get the most accurate results when using Yandex is to crop the picture so that it shows only the face of the person you are looking for. Since Yandex uses both facial and image recognition, removing needless artifacts is primal to your search results.
There are many other image and face recognition sites, However, most of them are paid and not even available to the general public. Yandex deviates from this and goes even further by being accurate and free to use.